4 Ways Shadows Can Add Impact to Your Photos
I used to be terrified of shadows when I was taking pictures!
I remember I wanted the image to be as free of shadows as possible, because dealing with them when they were falling on my subject was a nightmare I wasn't ready to contend with.
But once you have got to grips with the basics of your camera, introducing shadows is an amazing way to make your images more engaging.
Here's four reasons why shadows can add impact to your photos, and why you should start to try to incorporate them today - plus HOW to start adding shadows!
Ready? Let’s dive in!

#1 - Shadows create depth and dimension
Simply put, shadows in an image help to give it DEPTH.
Remember that when we take an image, we flatten a three dimensional world and make it into a two dimensional image.
What this means is that the camera brings objects far and near together, and flattens them onto one plane. (That's why it's only AFTER you see the finished image you realise there is a telephone pole sticking out of your subjects head - your eyes can take on depth, but your camera can't in the same way - it brings foreground and background elements and puts them together)
So, shadows can help bring back a sense of depth in the image, which in turn makes the scene more more three dimensional, and therefore more "real".
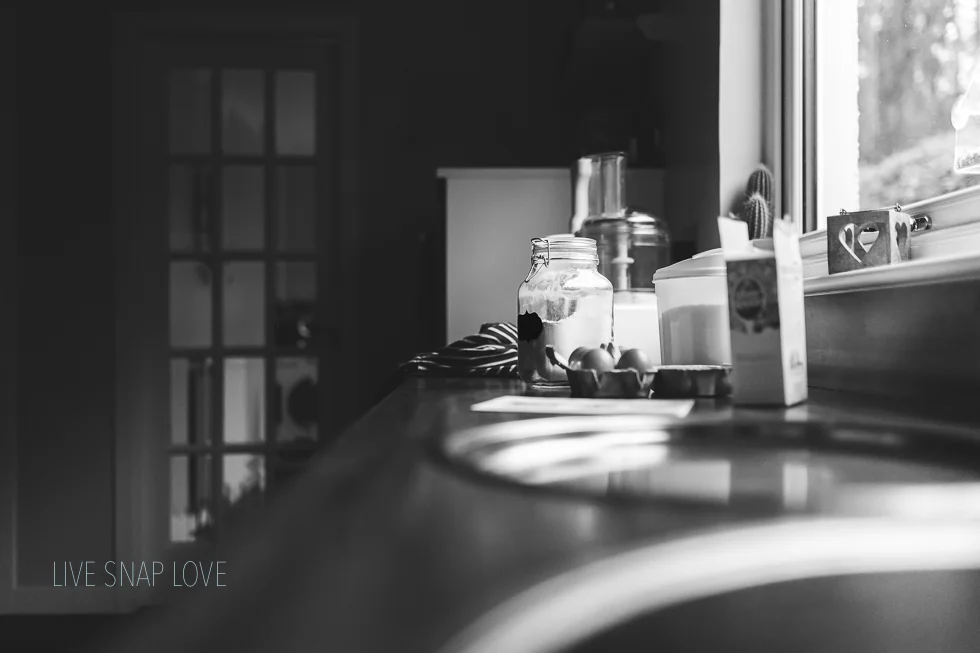
This image below isn’t of anything fancy, or even that interesting, but the play of light and shadow gives the image more depth and dimension, so adds interest to an otherwise mundane scene!
You can also add depth by introducing background blur - this again separates out the “planes” of your image to make it look more 3 dimensional! You can read more about how to get background blur here.
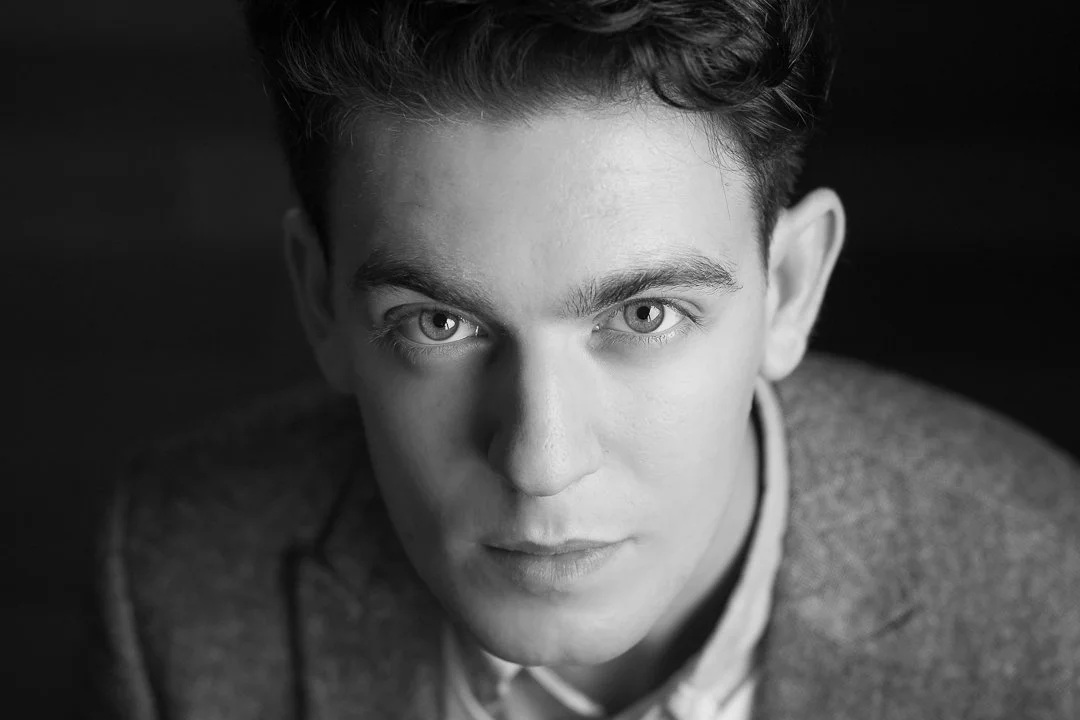
#2 - Shadows can highlight your subject
When you have most of the image in shadow, with just the light on your subject, then you are can bring attention squarely to your subject, almost like you are framing your subject with shadow and light.
It can highlight your subject and make them the "star" of the frame, or you can use it to outline your subject and bring more interest to the frame.

#3- Shadows make your image look 'touchable"
When you include shadows on your subject, you generally help bring out texture - and including texture in your images helps include a sense of touch in your images. Again, this helps the image look more real and engaging.
(Of course there are times when you DON'T want to bring out texture, for example if you are were photographing a senior with bad acne, so highlighting texture might not always be a good thing 😄. I personally wouldn't thank you for highlighting my crow's feet either)
For most images, texture means that a viewer feels they can reach out and pick an item up - an amazing thing to be able to do!

#4 - It creates contrast to help make more engaging photos
Our eyes are naturally drawn to areas of contrast over areas of non-contrast.
Having both light and shadow in your image creates light contrast - where you have shadows meeting the light. Basically, making sure your image has contrast is a super simple way to create more engaging images :)

So how do you add shadows to your image?
Now that you know WHY you want to incorporate shadows, the next step is to understand HOW to get them!
When shooting to get shadows in your images, you need to pay attention first to the light. To get started, make sure that the light is coming from the side, not from the front.
(If we light from the front, then you get the shadow behind your subject, but we don’t want that - we want a little shadowing on our subject!)
So place your subject next to a window, but so that they are standing at a 90 degree angle.
You then need to make sure that you are using manual mode, otherwise your camera is going to want to lighten the shadows (plus it will give you inconsistent exposures) and that’s NOT what we want!
If you’re not sure which settings you should be using in manual mode, then take a moment to download my FREE manual settings cheat sheet here. It’s totally free, and it’s going to lay out the aperture, shutter speed and ISO numbers for different situations - you will love this :)
I would also recommend that you blur out the background a little bit - again, just to add depth into the image. Use a larger aperture number for this, but make sure that you have enough depth of field to get your subject in focus! If in doubt, be sure to download that free settings cheat sheet I mentioned!
That’s it from me for today, but I hope you enjoyed this post and it inspired you to seek out shadows in your images!
As always, if you enjoyed this post, please share it! Pin it to your pinterest boards, share on Facebook, or just mention Live Snap Love anywhere and to anyone!
Thanks for being here, and I’ll see you again next week!
Audrey x